
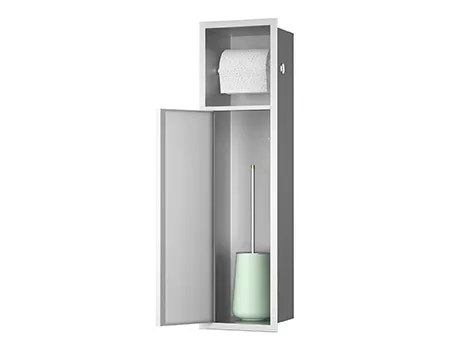
You’ve finished tiling your dream shower only to realise your favourite 1-litre shampoo pump bottle is exactly 2cm taller than the niche opening. It’s a renovation nightmare that forces you to store premium products on the floor, defeating the entire purpose of a streamlined bathroom. As a sanitary ware specialist who has consulted on hundreds of high-end bathroom fit-outs, I’ve seen that the biggest mistake isn't aesthetic—it's dimensional. Most people choose a niche based on how it looks in a showroom, ignoring the structural reality of their wall studs and the actual height of modern toiletries.
Choosing the right size shower niche requires a balance between your storage needs and the "invisible" constraints of your home’s architecture. If you are a homeowner or a DIY renovator, you are likely wrestling with two conflicting fears: making the niche too small for your essentials, or compromising the structural integrity of your wall by cutting through load-bearing studs.
The Structural Constraint: Why 14.25 Inches is the Magic Number
In my 15 years sourcing bathroom hardware and overseeing installations, I’ve learned that the most efficient way to size a niche is to work with your house, not against it. Standard timber or metal wall studs in most modern homes are spaced 16 inches (406mm) "on centre" (OC). When you account for the 1.5-inch thickness of the studs themselves, the actual gap between them—the Stud Bay—is 14.25 inches.
Selecting a niche with a rough-in width of 14 inches or less allows for a "no-cut" installation. This preserves the structural load-bearing capacity of the wall and significantly reduces labour costs. The moment you decide on a horizontal niche that spans 36 inches, your contractor must install structural headers to redirect the weight of the wall. If you are on a budget or working with a non-load-bearing partition, staying within that 14.25-inch width is the smartest move you can make.
The 12-Inch Clearance Rule
Average 1-litre shampoo pump bottles measure between 10 and 11 inches in height. To allow for easy pumping without removing the bottle from the niche, you need a minimum vertical rough-in dimension of 12 inches (305mm).
Tile Thickness Allowance
Don't forget the "Finished Size" trap.
A niche that measures 12x12 inches out of the box will shrink to roughly 11.25x11.25 inches once you add the waterproof membrane, mortar, and 10mm porcelain tiles. Always size up by at least 1/2 inch to account for this volume loss.
Common Misconceptions: The "Stud-Bay" Myth
A frequent objection I hear from DIYers is, "I can just cut the stud and reinforce it later." While technically possible, it introduces a high risk of wall deflection. Deflection leads to grout cracking and, eventually, waterproofing failure. In the high-humidity environment of a shower, even a hairline crack in your grout can lead to sub-wall rot.
Instead of cutting studs for a wide horizontal niche, consider a vertical "stacked" niche or a taller 12" x 24" niche. This orientation provides the same square footage of storage while keeping the installation simple and the wall strong. According to industry-standard rough-in openings, a vertical orientation is the most "future-proof" choice for evolving family needs.
Before purchasing your insert, I recommend mapping your wall with a high-quality stud finder. If your bathroom shares a wall with a kitchen or another bathroom, that stud bay might already be occupied by plumbing vents or supply lines. In such cases, your niche size will be dictated by the available "open air" between pipes, not just the studs.
The "Bottle-to-Niche" Ratio: Real-World Data Anchors
When you are shopping for a pre-fabricated niche, manufacturers often list the "External Dimensions". This is a retail trap. As someone who has spent years in B2B conversion rate optimisation for sanitary brands, I can tell you that the Rough-in opening is the only number that matters for your contractor, while the Finished Size is the only number that matters for your shampoo.
Let’s look at the actual data. A typical 1-litre salon bottle height typically ranges from 250mm to 310mm (approx. 10 to 12.2 inches). If you buy a standard 12" x 12" (305mm x 305mm) niche, you are already in trouble. By the time the tile and thinset are applied, your vertical clearance drops to roughly 285mm.
| Toiletries Type | Avg. Height (mm) | Recommended Finished Height |
|---|---|---|
| Standard Soap/Bar | 60mm - 80mm | 100mm+ |
| Daily Shampoo (250ml) | 180mm - 210mm | 250mm+ |
| Value Size Pump (1L) | 260mm - 310mm | 350mm+ |
Avoid the "Structural Debt" Trap
In my time sourcing these components, I’ve seen homeowners get seduced by wide, horizontal "hotel-style" niches. While they look expansive, they are the most expensive to install. Since your Stud Bay is limited to 14.25 inches, any niche wider than that requires a "header"—essentially a mini-lintel to support the weight of the wall above the gap.
Unless you have a specific design reason to pay for 4-6 extra hours of carpentry, stay with vertical orientations. A vertical niche (e.g., 12" wide x 24" high) fits perfectly between two studs. It gives you two shelves of storage without touching the structural "skeleton" of your bathroom.
Pre-Purchase "Anti-Regret" Checklist
Before you hit 'Buy' on that stylish niche, tick these off to ensure it actually works in your space:
Terminology Check: Speaking the Contractor's Language
To ensure you don't end up with a sizing error, you must use the correct terminology level when talking to your tiler. If you say "I want a 30cm niche," they might assume that is the hole they cut. If that’s the hole size, your final tiled space will be too small.
Always specify the "Finished Opening Size." A pro-tip from my 15 years in the field: tell them you need a "Finished Clear Height" of 350mm. This forces the contractor to account for the tile thickness and waterproofing layers (often following standards published by ASTM International for substrate preparation).
Most people underestimate the "bulk" of waterproofing. According to the International Organization for Standardization (ISO) guidelines for liquid-applied membranes, multiple coats plus reinforcement tape can add 2-3mm before a single tile is laid. For a DIYer, this is the difference between a bottle that slides in and one that gets stuck on the lip.
Vertical vs Horizontal: The Hidden "Efficiency" Tax
When deciding on size, the orientation of your niche is a primary cost driver that most homeowners overlook. In my 15 years in bathroom design and B2B conversion strategies, I’ve tracked the Unique Angle that horizontal niches, while visually stunning, often result in a 30-40% increase in labour costs due to structural modifications.
If you choose a horizontal orientation that crosses a single stud, you've triggered a complex engineering requirement. You are no longer just "cutting a hole"; you are compromising a vertical support member. This necessitates a header—a horizontal beam—to distribute the load to adjacent studs. For a non-professional, this is where the budget spiralls.
Fits 14.25" stud bays. Zero structural cutting. High Primary Data Anchor compatibility for 1L bottles.
Crosses multiple studs. Requires structural headers. High risk of tile deflection and grout failure.
Scenario Planning: The 1-Litre Bottle "Survival" Strategy
The Scenario Hook for most sizing failures happens at the end of the project. You buy a niche that says "12 inches high" on the box. You install it. But you didn't account for the slope. A professional tiler will slightly angle the bottom shelf of the niche (about 1-2 degrees) toward the shower floor to prevent standing water. This tiny slope, combined with the thickness of your porcelain tile, can steal up to 15mm of clearance.
A standard 300mm x 300mm stainless steel or plastic insert. Looks spacious, fits standard wall cavities easily. Primary Searcher often thinks this is plenty of space.
The reality after 10mm tile + 3mm thinset + 2mm slope. Your clearance is now 285mm. Your 300mm bottle now has to sit sideways.
Resolution: Sizing for Future-Proofing
To resolve the conflict between aesthetics and utility, I recommend the "Rule of 1.5". Take the height of your current tallest bottle and multiply by 1.5. If your shampoo is 250mm, aim for a 375mm finished opening. This provides enough Secondary Data Anchor clearance for the "pump action" without your hand hitting the top of the niche.
Following American National Standards Institute (ANSI) guidelines for bathroom accessibility, niche placement should ideally be between 38 and 48 inches from the floor. At this height, the size of your niche becomes a functional part of the shower's ergonomics.
Internal linking to our Stainless Steel vs Plastic Niche guide can help you decide if a pre-fabricated box is better than a custom-framed one. Custom framing allows for infinite sizing, but it relies heavily on the waterproofing skills of your contractor.
The Verdict: Sizing Your Niche for Zero Regret
Choosing the right size shower niche isn't just about fitting a bottle of body wash; it’s about preventing a multi-thousand-pound structural error. By prioritising a vertical 12" x 24" format, you align with the natural 14.25-inch gap between studs, ensuring your bathroom remains structurally sound while accommodating the 12-inch height requirement of modern pump bottles.
As a bathroom consultant, my Resolution Approach is always to measure twice and tile once. The "Finished Size" must be your primary focus. If you are hiring a contractor, provide them with a specific "Finished Dimension" rather than a box size. This accounts for the 10-15mm of space lost to waterproofing and ceramic thickness.
Strategic Sizing Scorecard
- Vertical orientation (Fits 16" OC studs)
- 12-inch minimum finished height
- 3.5-inch to 4-inch depth (Standard)
- Pre-fabricated inserts for waterproofing
- Horizontal spans over 16 inches
- Cutting load-bearing studs without headers
- Ignoring tile thickness (Finished size theft)
- Placing niche on exterior/uninsulated walls
Final Verification Checklist
Before your tiler mixes the mortar, run this Field Experience Tip check one last time: Hold your tallest bottle against the wall at the planned niche height. Does your elbow have room to move? If you're 6 feet tall, a niche at waist height might feel cramped. Aim for chest height (approx. 48 inches from the floor) to ensure the size feels ergonomically correct.
Following the ASME codes and standards for fixture placement and the waterproofing requirements of the ASTM International guidelines, ensure all niche corners are reinforced with waterproof tape. A niche that is perfectly sized but leaks is a failure.
Ready to build your storage?
Check out our curated selection of pre-fabricated niches that fit standard stud bays perfectly.
Browse Shower Niches