Why Do Long Vertical Shower Niches Pool Water and Leak Behind Walls?
Reference Standard: ASTM B117 (Standard Practice for Operating Salt Spray Apparatus) & ASME A112.18.2 (Plumbing Fixture Fittings)
Short Answer
Mid-Span Bending Mechanics: The Gravitational Deflection of 1200mm Spans
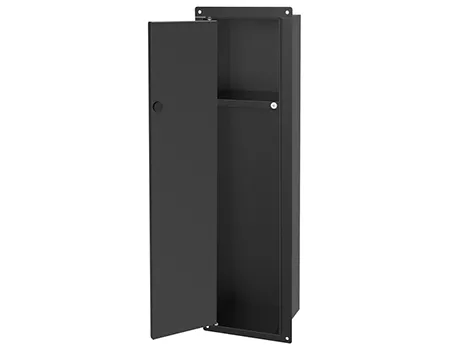
When architects specify a recessed shower niche 1200×300, they are demanding a highly complex structural component. A long vertical shower niche spanning 900mm to 1200mm acts physically as a “Simply Supported Beam” embedded within the wall studs. If this extensive span is manufactured from thin-gauge stainless steel without heavy-duty structural reinforcement, it becomes highly vulnerable to dynamic point loads. Every time a user presses down on a heavy, 32oz shampoo pump bottle, they generate a concentrated, downward kinetic force.
This repetitive force creates a severe “Mid-Span Bending Moment.” The stainless steel yields under the stress, causing the absolute center of the niche to deflect downward. Even a microscopic deflection of just 2 millimeters is devastating. It completely neutralizes the critical 1-to-2 degree pre-engineered drainage slope intended to shed water toward the shower pan. As the center sags, the niche effectively transforms into a shallow basin. Shower water, heavily laden with alkaline body washes and lipid-based conditioners, permanently pools in this newly formed depression. As the standing water slowly evaporates, it leaves behind dense layers of calcium carbonate and insoluble soap scum. Over weeks of use, these mineralogical deposits cement themselves to the stainless steel or PVD surface, permanently ruining the pristine aesthetic of the luxury bathroom and providing a nutrient-rich substrate for pink Serratia marcescens bacteria to flourish.
We can map the progression of this structural failure through an accelerated 12-Month Dynamic Point-Load Fatigue Model.
The Initial Yielding Phase (Months 1-3): The niche is loaded with 15 lbs of liquid products. The 1.2mm unreinforced 304 stainless steel exhibits a subtle, elastic sag of 0.5mm. Water drainage slows significantly. Hard water spots begin forming strictly in the geometric center of the shelf.
The Plastic Deformation Phase (Months 3-8): Repetitive downward pumping action exceeds the metal’s elastic limit. The steel enters plastic deformation, locking in a permanent 1.5mm deflection. The pre-sloped angle is totally negated. Water now pools continuously, requiring manual squeegeeing after every single shower to prevent massive calcium buildup.
The Critical Deflection Phase (Months 8-12): The deflection drops past 2.5mm. The heavy pooling of highly acidic or alkaline shampoos begins to aggressively attack the protective PVD coating, causing localized discoloration. The constant pooling exerts lateral pressure on the side flanges, threatening to crack the surrounding grout matrix.
A highly destructive, often-ignored secondary cascade of this mid-span deflection is the mechanical stress it transfers to the surrounding tile assembly. As the metal niche bows downward, it physically pulls away from the rigid thin-set mortar and grout lines that border its top and side flanges. This constant flexing crushes the brittle grout, opening visible cracks that allow ambient shower moisture to bypass the primary waterproofing membrane and attack the drywall backing.
KEY TAKEAWAYS
- The Marble Roll Test: Place a glass marble at the far edge of the installed niche shelf. If it rolls toward the center and stops, rather than rolling off the front lip, the niche has suffered severe mid-span deflection.
- Persistent Center Scaling: Heavy, chalky white mineral deposits that only appear in the direct center of the niche, while the edges remain clean, indicate a permanent drainage failure.
- Perimeter Grout Cracking: Hairline fractures developing in the grout joints immediately bordering the bottom shelf of the niche signify that the metal structure is actively flexing under load.
Thermo-Mechanical Fatigue: The Chemical Cleavage of Silicone Seams
Transitioning from structural bending to catastrophic in-wall leakage, we must examine the intersection joints of a tall stainless steel shower niche. Low-cost, mass-produced niches are often folded from a single sheet of metal and then merely spot-welded at the four corners. To achieve waterproofing, these manufacturers inject industrial silicone sealant into the vertical and horizontal seams.
However, a luxury shower enclosure is a violently hostile environment characterized by extreme thermal shock. During a typical shower, the ambient surface temperature can skyrocket from 15°C to over 45°C in less than two minutes. Stainless steel and silicone polymers possess drastically different Coefficients of Thermal Expansion. As the metal expands rapidly under the hot water and then contracts just as fast during the cool-down phase, the silicone sealant is subjected to relentless “Thermo-Mechanical Fatigue.”
This daily dimensional shifting forcefully stretches and compresses the silicone matrix. Over thousands of shower cycles, the macromolecular bonds within the silicone undergo chemical cleavage. The polymer physically dries out, loses its elasticity, and pulls away from the stainless steel substrate. This creates microscopic fissures (Micro-Fissures) at the corner joints. Because shower water contains soapy surfactants that drastically lower its surface tension, the fluid easily penetrates these invisible cracks. Driven by capillary action, the water is sucked directly into the dark, unventilated wall cavity behind the niche. This silent, continuous in-wall leakage rots the wooden studs, corrodes the light gauge steel framing, and breeds toxic black mold (Stachybotrys chartarum) that can spread throughout the entire bathroom structure before being detected.

Concealed Rib Fortification and Laser-Fused Isotropic Cavities
To guarantee absolutely zero deflection and permanent waterproof integrity for Tier-1 architectural projects, elite sanitary hardware manufacturers like Mondeway must entirely rewrite the physics of shower niche construction, utilizing concealed structural augmentation and high-energy metallurgy.
Execution Protocol 1: Concealed Rib Fortification
* Execution Protocol: Before the niche is formed, engineers must calculate the exact bending moment of a 1200mm span. The factory then spot-welds heavy-gauge, longitudinal SUS 304 or 316 reinforcement ribs directly onto the blind backside of the niche panels, effectively creating an I-beam structure.
* Material Evolution: This concealed rib fortification exponentially increases the Section Modulus of the thin stainless steel. It completely neutralizes the mid-span bending moment, ensuring absolute zero deflection even under a sustained 50 lb point load. The pre-engineered 2-degree drainage slope remains perfectly rigid, guaranteeing that water slides off the front lip instantly, permanently eliminating the threat of calcium pooling.
* Risk Mitigation: Welding ribs to thin sheet metal can cause intense localized heat distortion, warping the visible face of the niche. The factory must utilize low-heat capacitive discharge spot welding and rapid argon cooling to attach the ribs without compromising the perfectly flat aesthetic of the shower-facing surface.
Execution Protocol 2: Laser Seamless Welding
* Execution Protocol: The factory must completely abandon all chemical silicone sealants. Instead, 100% of the folded corner seams and backplate joints are fused using automated, high-energy Laser Seamless Welding systems in an inert gas environment.
* Material Evolution: The focused laser instantly melts the metal grain boundaries at the corners, fusing the individual panels into a single, continuous “Isotropic Metal Matrix.” There are no gaps, no sealants, and no overlapping metals. This creates a monolithic, absolutely impenetrable steel cavity. Because the entire structure is now one continuous piece of metal, thermo-mechanical fatigue is rendered physically impossible.
* Risk Mitigation: Laser welding leaves a highly oxidized, darkened bead line that is highly susceptible to future rust. The welded seams must be immediately subjected to an electrolytic passivation bath to strip away the oxidation and restore the protective chromium-oxide layer across the fused joints.
Execution Protocol 3: Nano-Hydrophobic Coating Application
* Execution Protocol: After the PVD coloring process (such as Matte Black or Brushed Gold), the entire internal surface of the vertical wall niche for bathroom is baked with a high-density nano-hydrophobic and anti-fingerprint coating.
* Material Evolution: This chemical treatment radically lowers the Surface Free Energy (SFE) of the stainless steel. Instead of clinging to the metal, water droplets instantly bead up into perfect spheres and roll away due to gravity, taking soap scum and mineral deposits with them. This significantly reduces cleaning time and protects the underlying PVD finish from aggressive, acidic bathroom cleaners.
* Risk Mitigation: Nano-coatings can easily flash off or cure unevenly if the ambient humidity in the application chamber fluctuates. Production lines must maintain a strict Class 10,000 cleanroom environment with absolute humidity controls to ensure the nano-polymers bond uniformly to the PVD substrate.
Execution Protocol 4: 96-Hour NSS and Hydrostatic Validation
* Execution Protocol: Randomly selected production samples are placed into a Neutral Salt Spray (NSS) chamber for 96 continuous hours. Furthermore, every single niche is subjected to a closed-loop hydrostatic dye-penetrant test before packaging to audit the laser welds.
* Material Evolution: Passing the 96-hour NSS test proves the SUS 304/316 composition and the PVD finish are completely immune to the highly corrosive, steam-rich bathroom microclimate. The hydrostatic test guarantees that the isotropic metal matrix is completely devoid of microscopic pinholes, ensuring a lifetime of absolute leak-proof performance behind the tile.
* Risk Mitigation: Even trace amounts of iron dust from nearby carbon steel machining can contaminate the stainless steel surface during testing, causing false “rust” blooms in the salt spray chamber. The testing facility must rigidly segregate stainless steel production from all other ferrous metal operations.
| Cross-Variable Control Matrix | Expected Material Performance | Industry Tolerance Limits | Testing Baseline Target |
|---|---|---|---|
| Mid-Span Structural Rigidity | Absolute zero deflection | Max 0.5mm sag @ 50 lbs | Dynamic Point-Load Test |
| Corner Joint Integrity | Isotropic monolithic cavity | Zero fluid seepage allowed | Hydrostatic Dye Penetrant |
| Surface Hydrophobicity | Rapid water beading & shedding | Water contact angle > 105° | Goniometer Contact Angle |
| Corrosion Resistance | Total immunity to steam/salts | Zero red rust spots | 96-Hour Neutral Salt Spray |
| Thermal Expansion Delta | Seamless expansion/contraction | No joint cracking allowed | 100-Cycle Thermal Shock |
PRO-TIP / CHECKLIST
- The Center Press Test: Before installation, lay the 1200mm niche flat on the ground and press firmly into the absolute center of the back panel. If you feel the metal “oil-can” or pop inward, it lacks concealed rib fortification and will definitely sag and pool water once installed.
- Corner Flashlight Audit: Take the niche into a dark room and shine a high-lumen flashlight directly into the outside corners. If you see any light leaking through to the inside, the joints are merely spot-welded, not laser seamless welded, and will eventually cause in-wall leakage.
- Water Bead Validation: Spray a mist of water onto the interior shelves. The water should instantly form tight, round beads and race down the pre-sloped edge. If the water smears out into flat, irregular puddles, the nano-hydrophobic coating is defective or missing.
- Magnet Adhesion Check: Run a standard refrigerator magnet along the flanges and inner walls. High-grade SUS 304 or 316 stainless steel is highly austenitic and should exhibit zero to very weak magnetic attraction. A strong magnetic pull indicates low-grade 400-series ferritic steel that will inevitably rust in a shower.
- Flange Flatness Verification: Place a 4-foot metal straightedge along the outer mounting flanges. The flange must be perfectly planar. Any warping or bowing will make it impossible for the tile installer to achieve a flush, waterproof seal with the surrounding cement backer board.
Frequently Asked Questions (FAQ)
How deep are shower niches supposed to be?
The standard depth for a residential shower niche is exactly 3.5 inches (approximately 89mm). This dimension is not arbitrary; it is specifically engineered to fit perfectly within the cavity of standard 2×4 wall studs (which measure 3.5 inches deep) without protruding into the adjacent room or requiring major structural reframing.
How to install shower drain plumbing correctly?
Installing shower drain plumbing requires connecting a 2-inch PVC or ABS drain pipe to a specialized shower drain assembly. The critical step involves ensuring the drain body is firmly clamped and chemically welded to the waterproof pan liner or membrane, preventing any wastewater from seeping under the mortar bed and rotting the wooden subfloor.
How to clean linear drain in shower without scratching it?
To clean a stainless steel linear drain, you must use a specialized plastic hook to lift the heavy grate. Remove the hair strainer basket and manually clear any keratin debris. Scrub the stainless steel trench using a soft nylon brush and a mild, non-abrasive enzymatic cleaner. Never use steel wool or harsh bleach, as these will permanently strip the PVD finish and invite deep pitting corrosion.
How to hook up a shower drain to an existing P-trap?
Hooking up a shower drain to an existing P-trap involves aligning the tailpiece of the new shower drain body directly over the 2-inch riser pipe extending from the P-trap below the floor. Once aligned, you must prime the PVC components and use industrial PVC cement to fuse the tailpiece into the riser, ensuring the P-trap remains full of water to block lethal sewer gases from entering the bathroom.